I know you probably are so tired of hearing me say this...
BUT...
I HAD SO VERY MUCH FUN.... making this book...
I think I am a frustrated little kid that loves to cut paper
Glue it...
Paint paper,
Cut it up...
Glue it...
and cut pictures and clip art up...
and GLUE IT...
Make pretty ribbons,
and tie them into bows...
but I LOVE IT ALL...
Do YOU????
See... there are some out there that are holding their hands up screaming...
I DO.... I DO...
I knew it.... well I had fun doing this...
This week-end I had my basket classes for the Kudzu basket making... what fun we all had... baskets were made by all and some were very unique while others were out of sight with different colors, of light and darker vines... some with bark, others stripped off... so very pretty... all were outstanding... I love teaching and being part of this type of thing... it was glorious...
So today I had the opportunity to create this little book in the peace and quiet of my studio...
it was very rewarding and I had lots of fun...
So here it is...

This is the finished book...
I will show you each section and also all the details etc...
I love the colors... and the designs of each section...
Don't forget this is a GIFT BOOK....

To start off with, my sweet husband had received a couple of books in the mail... this is the piece of corrugated that came in the books!!!
Waste not, want not... a good thing to practice...
I peeled off the outside paper... to show all the beauty...
and then folded it... unevenly, so that the front was shorter than the back...
I made this piece of paper this morning...
It is sort of a new technique... spun off of Pamellia Johnsons tehcnique...
I will tell you a combo of what the two are...
Pamellia took the textured paste and put it onto paper,
used embossing powder and a heat gun to finish it ....
I did the same with black paper, textured paste, and purple embossing powder..
BUT then...
I took my Versa Mark pad and ran it lightly over the textured paste that had been embossed with the purple... and added some Steam....
then I did it again...
this time adding Lettuce...
then I did it again...
adding milled lavender...
WOW... what fun... what colors...
it got a little thick.. what an exciting feature... the colors slipped into the area that had no texture paste... it just turned into a wonderful piece of paper... I really didn't want to cut it up... but hey... new rule...
USE IT...
or you might not find it again.. .
LOL...
LOL...
TRUTH... sorry to say..
With all this stenciling... I am also putting this into the
Simon Says Monday Challenge
which is all about stenciling...
With all this stenciling... I am also putting this into the
Simon Says Monday Challenge
which is all about stenciling...


And I snuck in a few little ones too... can you see the little purple one...
I used ribbon to cut the flower out... and then some stamen in the center... love it...


I used Tim's Tattered floral strip and used the leaves here...
I used a sort of new method on these...
I colored them with ink on the work sheet, but then I rolled them up until they dried... then I sort of unrolled them... leaving a lot of the paper curly, etc..
Can you see the embossing... love it..

finished cover....
Below are a few more closeups... just love this cover... couldn't stop taking shots at different angles... LOL...


It is a Sizzix Die... oh so very elegant... all by it's self...
Lovely and ELEGANT.. needs nothing else.. but I did put a little bow around its neck... it wanted to be dressed for the occasion...
I also made it into a pocket... by putting double sided tape down the two sides and across the bottom... thus a nice envelope...

Then I made this to slip inside... and there is a arrow at the top... it is a little hard to see... up by my name...
it is purple...
it says PULL UP...
A little tangling... too...
When you pull it out.. a folded check is there as the gift...
YES... GREAT GIFT...

You know that I don't stop with one thing in a book.... don't you???
So onward...
I made a piece of paper... 8.5 x 11... using tim's method of coloring paper... ink onto my worksheet and then dragging the paper thru it... oh what fun.. .then I add some other color if I desire it... this time I cut the paper in half...

and made two envelope... no flaps... they just fit into the booklet cover... perfectly... wow... I am getting good with this measuring thingy...
I use to draw a lot of digital images and sell them.. this is the wreath... I printed it, colored it, cut it out and glued it onto the pocket... a pretty K and Co butterfly...

And on the other pocket front, I put a die cut/embossed paper by Cuttlebug and then put this cute little bird on there... it was stamped...
but when???
by WHO????
BUT I did watercolor it...
and then cut it out...

When you look at the edges of the book... this is what you see... so now I will show you all the goodies...

The inside flap...
A little doily and inside the doily... which is used at a pocket here...

Is another little fold up paper... I have the sizzix die for that too... but it has no name on it... ???? but it is a square and has rounded half circles on the four edges... love it...

I put a flower on one of the half circles...

This is it all open... and as you can see I have foil butterfly stickers all over it...

This is how it looks when it is all folded up... I am going to use my stickers up too... I have tons of them... and I really love some of them... like these...
Also this little folder is only about 2x2 inches... and it can also hold a bill... or a check also... but I have a little butterfly inside for right now...

In between the two pockets is this little paper, with the bird in it... just a little pretty... nothing more or less... just because...

The next pocket is this...
that I showed up above...

Inside each pocket, I have a tag... of course...
Each tag was also a lot of fun... naturally it was...
this one I put a doily on the top and then some Pickled Raspberry inked paper... with a little bit of purples... but love the PR...
A Swirl, and Textured paste queen Anne's lace flower... and some Chit chat...


That is the first tag...
Then the second tag...

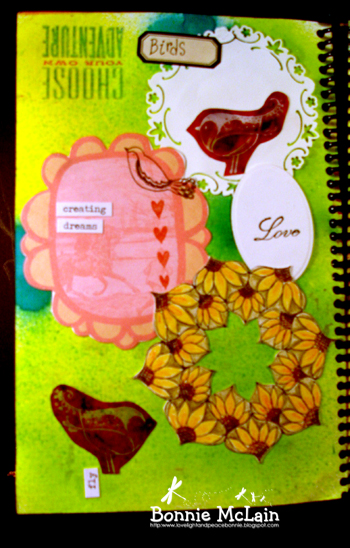
Okay... this one is a little bit different...
The same textured paste with the same stencil... a little bit different color background... but then a Just rite stamp... and the word LOVE stamped and under it ... YOURSELF...
You can't love, truly love someone else, with out loving and knowing your self FIRST...
Love yourself...
Love others will full intent...
How very BEAUTIFUL...


FINISHED
Now all I have to do, is to find a box to mail it in... LOL.. that will be the hardest part of the whole project...
But then again... the Post office has these great free boxes... that this will most likely fit into with extra space... LOVE IT...
Okay...
So first project of the week...
three Challenges...
Have a great week.. .and please check back here tomorrow for more challenges...
and Please dont' forget...
hope you will take a look at what I have created for this one...
WOW is all I am going to say...
thanks for stopping by today for a look see and a visit...
Love, Light and Peace...Bonnie