I have seen so many of these great Circle Easel cards… and I just had to do one… so I got out my Just Rite stamps and started to play with what I was going to put on the card… since it is full time spring here… I decided on the birdhouse and the You’re so sweet stamps.. I also chose a chickadee bird stamp for the little critters that were going to move into the houses… Three birds… three birdhouses…
Okay… I also wanted to use some of my new spellbinders… so I actually punched out a whole bunch of them… and then played with how they were going to stack up… that is what I always do… and generally always in white paper… Love this circle heart die… so great.. I love hearts anyway… so I know that I will be using this a lot…
I also used another favorite punch… my Blue Hill Lotus punch… for the background… I started to layer and was done before I knew it… I am going to have to make a few more… this was fun…
Hoe you have a wonderfully GREAT day… enjoy your self in everything you do and create…
Study in Teal is a sympathy card… I don’t’ like having to make these … but every so often we need to use one… and this one hopefully will not be used for a LONG time… but it is ready when I need to ….
I had this really pretty teal swirl paper… and then added a lime green floral paper that I punched the edges on for the background… Then a Blue Hill punch was used on white paper and then a lime scalloped oval…
Now the Just Rite stamp… which says… “Nothing is harder than saying goodbye to someone you LOVE”is so lovely… and I painted it with my twinkling h20’s… and it adds such a nice soft flair to the card… I didn’t want it to be just the white…the little border around the edge is also Just Rite… these Just Rite stamps are Just Rite for so many of my needs… I love them…
The flower… four layers of Pretties by Bonnie Flower… 2 inch, 1.5 inch, 1.25 inch and 1 inch flowers were used to make this one flower… each one hand painted and then cut out and molded to create this pretty… a gem was used in the center of this one…
You are a gem to stop by here for a visit… thanks ever so much.. hope you enjoy your day… and created something special for someone in your life…
but when you look at it.. it is so spring… yellow flowers with red pearls for centers… so very spring/ summer like… Again I used a frame from the Friendship Blooms set… and added some of the flourished hearts by the Martha Stewart Punch… The background piece is done with a Blue Hill punch… The flowers are naturally from Pretties by Bonnie…
Spring is on the way… so just make sure you keep your eye out for all the fun signs of spring… Robins arriving… Crocuses popping up… Yellow flowers blooming all over the place…
Thanks for stopping by… and hope to see you again tomorrow with a little more Spring …. Love this season… don’t you???
In yellows and greens… Love it.. I used some of the new stamps from Just Rite… and created background… and then the medallion also.. I used the Olive Archival Ink by Ranger… which I love these inks… and then I used Twinkling H20’s on the flowers… which are Pretties by Bonnie
Then I punched the white background using a water lily punch by Blue Hill…. The heart filigree is a punch by Martha … THEN I added the yellow braid… love to make them… so elegant for a card…
Thanks for stopping by and hope that you have a fabulous day playing and having fun.. Love, Light and Peace....Bonnie
I started this card off with a 6inch circle that I cut from a Blue Hill Flower punch… I love these punches… they are so very versatile… you can make a border, 3inch and a 6 inch circle… a square any size and a rectangle any size… and also a 5 inch oval… all with ONE punch… you can not ask for more from a punch… I love them…
Anyway… I also used a Martha punch on the colored paper for the center then top dressed the circle with the saying from Just Rite Stamps… I added a few flowers from Pretties by Bonnie… and added a bow… love the way the card flows… I did add a few of the filigree hearts on the corners… just for a special touch…
To color my flowers, I use Twinkling H20’s or my tombow markers… and on these I added pearls for the centers… just to give them a little more glitz… yes… that is the way I love it… frilly and fancy…
I want you to know that my house is very tailored, and I dress very tailored… but my cards… well that is another story… lace, frills, and all the fun things… never an empty space… that is for sure…
Hope you have a wonderful day… and thanks for stopping in for a chat… hope that you do leave a message… I love reading them when I can get onto the blog… yes I am having huge problems with getting my cards posted, viewing my own blog… and even getting my mail… but I am giving it the best I have… sorry I can not see what you are doing… but one of these days, as I keep on hoping that things will change and they will tell me that I will have dsl… or a faster method of getting on line!!! You will hear me singing … that is for sure…
Pink Dot… I bought some more dotted paper and decided that I have to use some of it… I am trying not to hoard paper any more… and use it, prior to it going out of style… LOL… yes I really feel so much of the paper I have has gone out of style… and that is what I am using for my envelopes…
Anyway… I love this pretty pink and green card… again … see what I mean… pink and green… a favorite of mine, that is for sure…
Lets start off with the center stamp… From Just Rite… a new one… and I used a sage green ink… and then I put it on a Spellbinder oval beaded… and then onto a doily made from Blue Hill Bird punch…
And the FLOWERS… yes they are from Pretties by Bonnie… and I used the Martha Filigree heart in the corner… a double satin bow made from 1.5 inch wide ribbon… love the lushness of the bow… a few pearls all around… and I love it… and I know just who is going to get it…
Thanks for stopping in… and I do hope that you have enjoyed this card, as much as I enjoyed making it…
Earth Laughs in Flowers… by Emerson.. so very true… and I love the laughing… I giggle all the time.. and it feels so very wonderful in all ways…
So this stamp really is so lovely. Now for the other stamps used… the violet medallion is by Just Rite… and it is really a great set… I love it… I stamped it out in about 6 colors… and started to play… wow… then I cut the center out of them… and sunk a message in the center… I do have the Spellbinder that matches with it… so that was perfect… I used a doily effect for the background using my Bird punch by Blue Hill… Oh yes… I had a few new punches from Martha… one was the ribbon border on the edge of the card.. and also the heart in Filigree… love them both… The FLOWER…. ??? Of course it is from Pretties by Bonnie…where else would it be from…
It was raining on the day when I made these cards… and I just sat there and whipped out about 10 of them… I will share them one by one… gives me a chance to get other things done… and then you won’t be wondering where I am… LOL…
So here is the first of many to come…
Hope that you have a wonderful day… and thank you very much for stopping by…
I know that if you have made only one card in your life that, that this has happened to you…. You start with a great idea… and then the card changes into something else entirely different than you stared it out to look like… Well that is what happened with this one… but I left it and still love the way it looks, it is just not what I had envisioned it to look like at all.. LOL…
Okay… the heart border is with Martha’s heart border punches… and then I added a circle that I created with the Blue Hill punch… I love those punches… you can make a 3 inch or a 6 inch circle, a square, rectangle or oval and also a border all with ONE punch… how great is that… I love these punches and I think I have most of them… there is a learning curve… but if you pursue ityou will make a perfect one each and every time…
The flower punch is another new Martha punch… and the Heart is naturally a spellbinder… as is the circle… but the stamp in the center of the circle.. a Just Rite stamp!!!A favorite one too… the flower is a Prettiesby Bonnieflower… hope that you will take a look at all the digital images that I have for sale on the Pretties by Bonnieblog… you can find all kinds of flowers and even a few critters…
I used a few flourishes on this that I used my Tim Holtz die cut template for… just to add some zing… The gems also add a lightness to the card for the feeling of spring to come QUICKLY…
Hope that you are having a wonderful day… and Thanks for stopping by for a visit… Love, Light and Peace....Bonnie
Do you get a lot of really pretty Christmas cards...??? This year we got so many outstanding cards... I love them all.. One dear friend, Ann by name... LOL... she knows this anyway... but jsut had to say her name with this wonderful card... Anyway, she sent me a beautiful card... I studied it and then made this one...
It is a gate card... but when you open it, it has a surprise... Look below for the surprise...
I love this card... It is for a Birthday card...
The front has the circle made from the Blue Hill Lotus punch... and then I added another layer also made with another style Blue Hill punch...
I made the flower using a Spellbinder flower die...
There are 8 layers on this flower.... I used Mustard seed distress ink on the petals....
The leaves are from Pretties By Bonnie
And the ribbon goes around the card to hold this surprise in place...
When you open this gate card, you will find a box... wow... how special is that...
You can put all kinds of items in there... but I put a lot of little tags with special messages on the tags...
They hopefully will fall out when the card is opened... and the tag with LOVE can now be seen a lot better...
What a card... I love this style Ann... thanks for sharing this with me... I am going to try and make a few more... they are really neat...
How special is Ann that she shares this with me... and then I can share this with you... I am going to make a few more and then I will share the directions with you too...
Are you still spreading JOY... please do... and add a little love too... it certainly doens't hurt... Glenn and I have always practiced that what you give out, you get back two fold... this workds the same way... so spread it generously... with gusto!!!!!
Thanks for stopping by... I really love it... I would love to have you join the group that follows too.. I am wanting a group of 300... as I have a lot of fun things to give away... the pile had to be moved into another box... it is growing... wow... ...
Filling each day with Joy is something that each and everyone of us should do... it is very important to feel this from deep inside of us... it is also very contagious to all around us... and this is needed in this world today...
So My message today... JOY in all ways...
I tried to capture Joy in this card... it is a thank you card for someone very special in my life... and I wanted to show that .. Hope I did..
I have used quite a few things to create this special card....
The fern paper that I used as the background has to be at least 5 years old... a very special paper to me...
Then I used some of Martha's punches...
And some Spellbinder and also a punch from Blue Hill... I love those punches... they will punch a 4 or 6 inch circle... a square anysize you desire... and an oval... and also a rectangle.... then also on top of that a border!!!! Wow... what more can you ask for???
Anyway I used the lotus style one here...
I created an easel card... and it really has about 3 places to catch it... maybe even more... but you get the idea...
On the top section... I made a square of 5x5 inches and then used a Polka dotted Cuttlebug folder for the background... then on top of that a few spellbinders.. and the sentiment... of course that is from Just Rite Stamps...
But the Flower.... that is of COURSE from PRETTIES BY BONNIE I love flowers... I know that you know that... but I love making them for cards... I just think it is the finishing touch to a card... love them on there anyway...
A little bow... and voila' DONE!!!!
A close up view of that area... I have used a gold gel pen around the edges of the flower petals... and also used a few different colored markers on the petals also ... each detail just seems to add a little more to the card... and ya'll know I love details...
I used a dew drop in the center...
The bottom half of the card...
I used another flower which is exactly the same.. and put that on another pendant which I made, using another punch by Blue Hill... and a couple of layers from Spellbinders and Cuttlebug... jsut to give some depth...
I hope that you have enjoyed this card... I can hardly wait to send it today... I hope that the person I am sending it to will love it also...
Have a super nice day... and enjoy the JOY in your life... make some anyway that you can... and spread it around all over the world.... you will benifit from it greatly... in all ways...
Thanks for stopping by... as you have spread some joy just by coming here... thanks...
Love, Light and Peace...Bonnie
I had a little bit of free time.... actually I was up in the middle of the night... and wanted to play, so these are what I made... of course I paid for it today... but that is okay, I did enjoy it...
Here is what I created... I had jsut bought the Label 4 Grande and I decided to use the next to the largest... as I dont' have one of the new machines, so the largest one I can not use in my Cuttlebug...
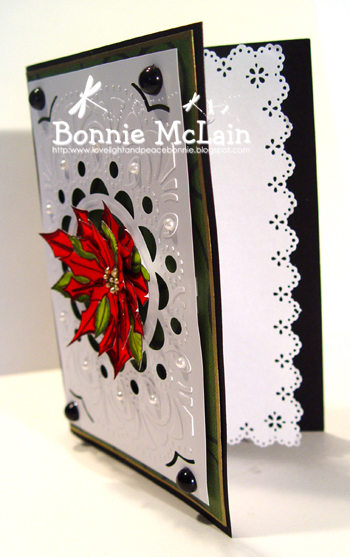
Anyway I cut the label and folded it in half... to create a card.. I used the center of one of the Poinsettia die cuts... and added another smaller Label 4 for the background. I used the Swiss dot Cuttlebug folder for that... Then I wanted to off set this, so I used a small section of the Bluee Hill punch on the side to create the paper lace...
A simple little bow and it was complete...
A close up of it...
I used gold around the edges... just to define the edges...
The poinsettias are naturally from Pretties by Bonnie and I used Tombow markers to color them...
I love these holly poinsettias... and these are layered...
I used a very soft green to sponge onto the frame in the background... I think it was bundled sage... by Ranger.
Have you ever painted a stamp with Twinkling H2's??? I love to do that... Generally you can get 10 plus prints from one painting...
Here are three that I really liked and turned them into cards...
After the paint dried, I restamped the original design again with Archival black...
This is many layers of white on white Cuttlebug folders .... and then the green layer behind the print is Twinkling H2O paper that I made...
Simple and I think elegant in looks...
This one I really love.. I again made this as simple as possible... I used the Poinsettia frame and left all white...
The print was left whole, and I stamped the sentiments on it...
When I made the cut card... I decided that I wanter the white to really stand out... so I didn't put anything on the side panels...
But I did add one of the Time Holtz deers..
Same print again, but this time I used a label 16 to cut it out... and then I used the Cuttlebug folder to make the background... and I added some paper lace by using a Martha Punch...
Down at the bottom I used a Spellbinders deer from the Holiday Fancifuls set... and a little tiny pearl for the nose...
Peace on Earth to all..
Well I want to thank you for stopping by for a visit... and hope that you come back soon again...
I love this ornament die cut by Spellbinders.. The first time I saw it, I knew what I was goign to do with it... and I finally got them finished... I still have a few more started, but wanted to share with you so you could do some too... They are really fun.
I started off by making all kinds of sizes and piling them up until I got the desired look... then of course I started to cut out the centers... Everything is front and back.. and the poinsettia center does turn... and what you see here is on the back also...
The gold cord runs right on down the entire ornament... and then there is a loop at the top to hang it on the tree... and also on the front of a package...
This one I embossed the edges, and really prefer the gold pen to that... but wanted a different look...
The poinsettia and the cardinal are from Pretties by Bonnie of course.... and the ornament is a dark hunter green... The pointsettias are layered and I used Tombow markers on them...
Here is a close up of the same...
The paper that I used for the red is bazzill and I love the texture for this...
Now of course I had to have a card to match this... so ........
I really had fun with this one, as I love to layer as you know... and the more layers the happier I am... I had this one sheet of this pine needle paper.. and had been saving it for a special card...
I used my Blue Hill punch... if you have problems with this, use a thinner cardstock, and then STAND UP when you punch... and put a hand on the back of the magnet area and then on the top to punch... works great... I used some Twinkling H20's by painting them onto the stamp and then spritzing... love to do that...I actually got about 10 prints from this one painting...
The label is from the Cuttlebug Embossing plus folder labels... and I love them for certain looks... This one I wrote Merry Christmas on... and then put onto the card...
The cardinal and the poinsettia are from Pretties by Bonnie and I used my Tombow markers to color them... The poinsettia is layered and also the center is done with Liquid pearls by Ranger.
Okay... now do I ever stop at one???
I had to make and show you another one too..
I loved this because it is a little bit different in that I didn't cut the center out... I just started to layer all kinds of snowflakes... all by using this years and last years snowflakes by Spellbinders...
Then a few blue rhinestones... and a little silver pen around the edges...
Here are the close ups of this ornament...
The Top of the ornament up close...
I hope that you make a few...
I am going to put these on a few special packages... and know that they will really make the gift special..
Hopefully you will enjoy making a few of these... they are fun and how pretty on the front of a package...
Thanks for stopping by for a visit and hope that you are filled with the holiday spirit ... Enjoy the love that you put into everything at this time of the year...
Wow... I opened a box this yesterday to find the new Cuttlebug Embossing Plus folders... I only bought two of them for myself... but they are all great... I bought this one... which I love... it is called Deco Burst...
I did very little to this one, so that you could see the embossing folder easier...
There is really a wonderful center for this also... you will see that on the next card..
I am trying to use up odds and ends around the studio also... as my bins and bags are getting filled and I need to use some of these things...
This is one of the items that was in a bin... the center piece all punched and ready to use... and also the black cardstock card... so these went hand in hand, perfect!!!!
So you get to see the inside as well with this one... I usually dont' stamp anything in the center of my cards... I love to hand write a note or sentiment in there... so this is no exception...
This is the Deco Burst... and really a wonderfuly folder...
Here's the other one I made with the same folder...
This one is has the center piece in it.. I used my Antique Linen distressing ink to show the design a little bit more..
The poinsettias on both cards are from Pretties by Bonnie
and they are two different sizes...
Both of these cards are 5 x 7 size... and even though they are lumpy, I hope they go thru on a single stamp... .
Now this one is called Whimsy ... and it also has a center by I have not used it here... in fact I made a lattice for the center.. a little spring like, but I am already wishing for Spring... LOL... truth...
So I used some pink... and then some pink poinsettias and a RED cardinal and then a piece of Grunge flourish which I used gold on it...
I do like this folder as well... so many things to use both of these folders for... my mind is spinning... just need a lot of time to produce all these cards and ideas...
Okay... so that was the Provo Delivery... but a few hours later... the Fed Ex man arrived with the Spellbinder order... yikes... I was bad there too...
I got one of the new GRAND Sets... Label 4.... and this is how I have used it for this first card...
I folded it in half.. and then stamped holly leaves all over the ivy green bassill paper... this card is 6x6 and so you can get an idea of the size of this... this is not the largest one.. as I dont' have anyway, other than a rolling pin to use it...
I used a holly wreath from Pretties by Bonnie and then a cardinal from Heartfelt...
The back white punched circle was made by using the Blue Hill punch... this one has a bird theme... love them...
So that was my day... today we went and got our eyes examined ... yikes... that was costly... but well worth it...
Hope you have had a good day... enjoy your evening... and thanks for stopping by for a visit... some day I hope that I will be able to go around and visit all these fantastic blogs... being on dial up it takes a little to long to view one blog... over 30 minutes of download for me... so I spend my time creating and posting... the posting takes more time than the creating... LOL... not funny Bonnie...
Oh well.. thanks again... and have a fun creative time... Love, Light and Peace...Bonnie
This week for Just Rite Challenge I have made the following goodies... The challenge is to share recipe, share an idea for a cookie swap, all that kind of Christmas fun stuff... so I created this...
I will show you each piece indivisually also... and explain the whole set also.... I love to make fudge... but the mess and the time... ugh... but this recipe takes one bowl... and less than 5 minutes... okay the hardest part is waiting for it to chill in the freezer!!! that is an hour... not fun... but make a card or something... LOL...
This whole set up is for a cookie exchange... the Stand up tag... is to put next to a plate filled with Almond fudge..... oh how wonderful it tastes... that is so that everyone knows what it is... and how 'sinfully delicious' it is...
I used the Spellbinder die, with the paper folded so that it made a stand up small card...
And then used a couple of other layers to create the red and green background papers... which by the way are that wonderful core'dinations paper... love it...
On the very top... the Just rite stamp... except I didn't stamp the word JOY that is in the stamp... and I hand wrote the words Almond Fudge...
I colored the Just Rite stamps with Tombow markers...
Black pearls are on the beaded oval...
Then... to put some samples in... so that everyone gets to take sme home... I made these fun little boxes...
Each box holds a couple of pieces of Fudge... that I wrapped prior to putting it into the freezer... You will understand that after you see how EASY it is to make this sinfully delicious FUDGE...
Okay.... this is one of my very favorite-est Christmas papers... and last year Brenda found some and bought me a few extra sheets... I thank you again Brenda... I have one sheet left... ugh... I use it very sparingly to say the least... I just love it... It was made by Provo... so you know it is an old paper...
I used a paper punch by Blue Hill that has the cutest little birds on it... and cut is apart, so that a section was on each side of the box... and then put burgundy ribbon around the box in two directions...
Of course on the top of each BOX....
An adorable little tag of HOLLY... how special is that... Just Rite stamps seem to fit into every area of our lives... just look and see how many different places you can use them... You will be surprised... I just think this is the finishing touch to this adorable little box of Almond Fudge...
What do you think???
Cute or what...
Here is the box done in another paper... and for the swap, I will most make each box different... choices are fun... each box though will have the same amount of Fudge!!!
This box I used a piece of burgundy holly paper... and a dard green cardstock bottom... again I did use the same Blue Hill Punch on the bottom.
Also used the same Holly stamp on the tag...
When something is perfect... why change it...
Right???
Now for the part you have been waiting for...
I know YOU....
You might think I don't... but I DO know YOU...
This is the recipe card...
Don't bother to copy this... I will have it below... and it is the ENTIRE long version...
Anyway.. .I used a few Label 17 by Spellbinder... adn created this recipe tag... which I will make one for each person to take home, along with thier little box of Fudge... On the top of the card... which does stick up a little bit higher... so that you can find the recipe easier... is the Spellbinder scalloped ovals... and in the center of the white one, I have used again the holly with the Almond Fedge that I wrote... Next thing on my list of stamps to buy are letters... I love those and have to get me some... that is for sure... but for now, this works... I used Tombow Markers to color it in..
Now for the recipe..
ALMOND FUDGE
1 cup of almond butter 1 t. Vanilla
¼ Raw Agave ¼ cup Cacoa Powder
Mix …. Wrap in wax paper Hard part
Put in freezer for one hourCut and serve…
Okay… now I have added a few things from time
To time also… Like some chocolate chips… chopped
Up sunflower seeds, or any kinds of your favorite
Nuts or seeds… they are so wonderful in this…
I also have even put in some Gogi berries and dried
Cranberries… so have fun with this recipe…
If you are using another type of ‘sugar’ I most likely
would add more… agave is a wonderful sweetner and
very sweet, so less can be used… which is good for us
in all ways..try it… it is really delicious.
When I make this, I do make it into a few different wraps,
as you most likely will eat all that you take out of the
freezer…. Otherwise you will be making this all the time… LOL..
It is delicious! ! ! !
The hardest part is really waiting for the fudge to freeze... and also not to eat the entire batch of it...
Have fun making this... and enjoy giving it also...
Hope you will have fun today... and take a look at the Challenge on Just Rite... add your recipe to the list and maybe you will win the newest of their STAMPS.... wow... what a gift...
Thanks for stopping by for a visit... I really appreciate you coming by... Love, Light and Peace...Bonnie