Followers

Showing posts with label Tim Holtz Mini Misters;. Show all posts

Thursday, July 3, 2014

Tim Holtz's July 2014 Tag.... SUMMER TIME

What a fun time I have had with THIS challenge...  so much fun... I am excited to share it all with you... 

I have a FEW projects... and each one I really enjoyed making and creating... a little bit here and there...  and all of a sudden I have quite a few tags, projects and having more and more ideas...  so I finally created one that I really really loved... and that is good... as now I can say I have done this challenge...  Hope you like these...

 
Okay... this is the LAST one I did... and I am showing you this one first off... as I like it the best...
But more on it later... 
 
 
DSC00428
 
Here is Tim's tag... it is really a great summer time tag and all the techniques are really fun to use...  so I wanted to try it out... 
 
I had the Mini stamp set of the seahorse... so I had to put on my thinking cap...  hummmmmm.....

 
Okay...  I can draw a large one... and then use the stamp set to create the babies... following the daddy seahorse...  yes... that is what I will do... 
 
So I did this tag... 

 
I have to say that I got so very excited about creating the SAND .... that I had to use a few smaller tags first ...  and then the fun really started...  so now I had 4 tags started... do you see what is happening...???  Oh well... I was waiting for the crackle to dry and one thing led to the other... 

 
I really love the bright colors on this tag... and these little seahorses are great too... love the daddy one...

I really had fun making the seaweed... I used the branch from the pine cone die cut... and then embossed many different GREENS onto them.... then I added dots of stickles glitter glue...  and also the turquoise is distress glitter...  when I went to put them onto the tag, I was able to fold and create the look I wanted, as I had done this to both sides of the branches... 


These are shells that were collected by My Mother many years ago... she would be happy to know that I have used them on a tag like this.. . love this sand stuff... greatest thing since sliced bread... LOL... love it... 

 
Okay... when I was trying to think of things I wanted to create for this tag... I thought about making some shrink stamps and putting them into an ideology bottle... but the one that they would fit into... I USED THE DAY PRIOR!!! On my White on white creation...  oh my goodness... Anyway... I had another great idea...
But this is what they looked like after I stamped them... and then heated them up... 


When I was a child we spent our summers at all kinds of beaches... My great grandparents lived in Maine... and so I spent at least three to four weeks a summer in Maine...(all family)   and then on the way home we would stop in good ole Cape Cod for a vacation...and then since I grew up in New Jersey... the JERSEY SHORE was the place to BE...  But as a child... I had to have a sand bucket... it was used for all kinds of things... so summer meant a 
NEW BUCKET... 
 
Here is my NEW BUCKET...  
I colored the little shrink figures after I shrank them...    
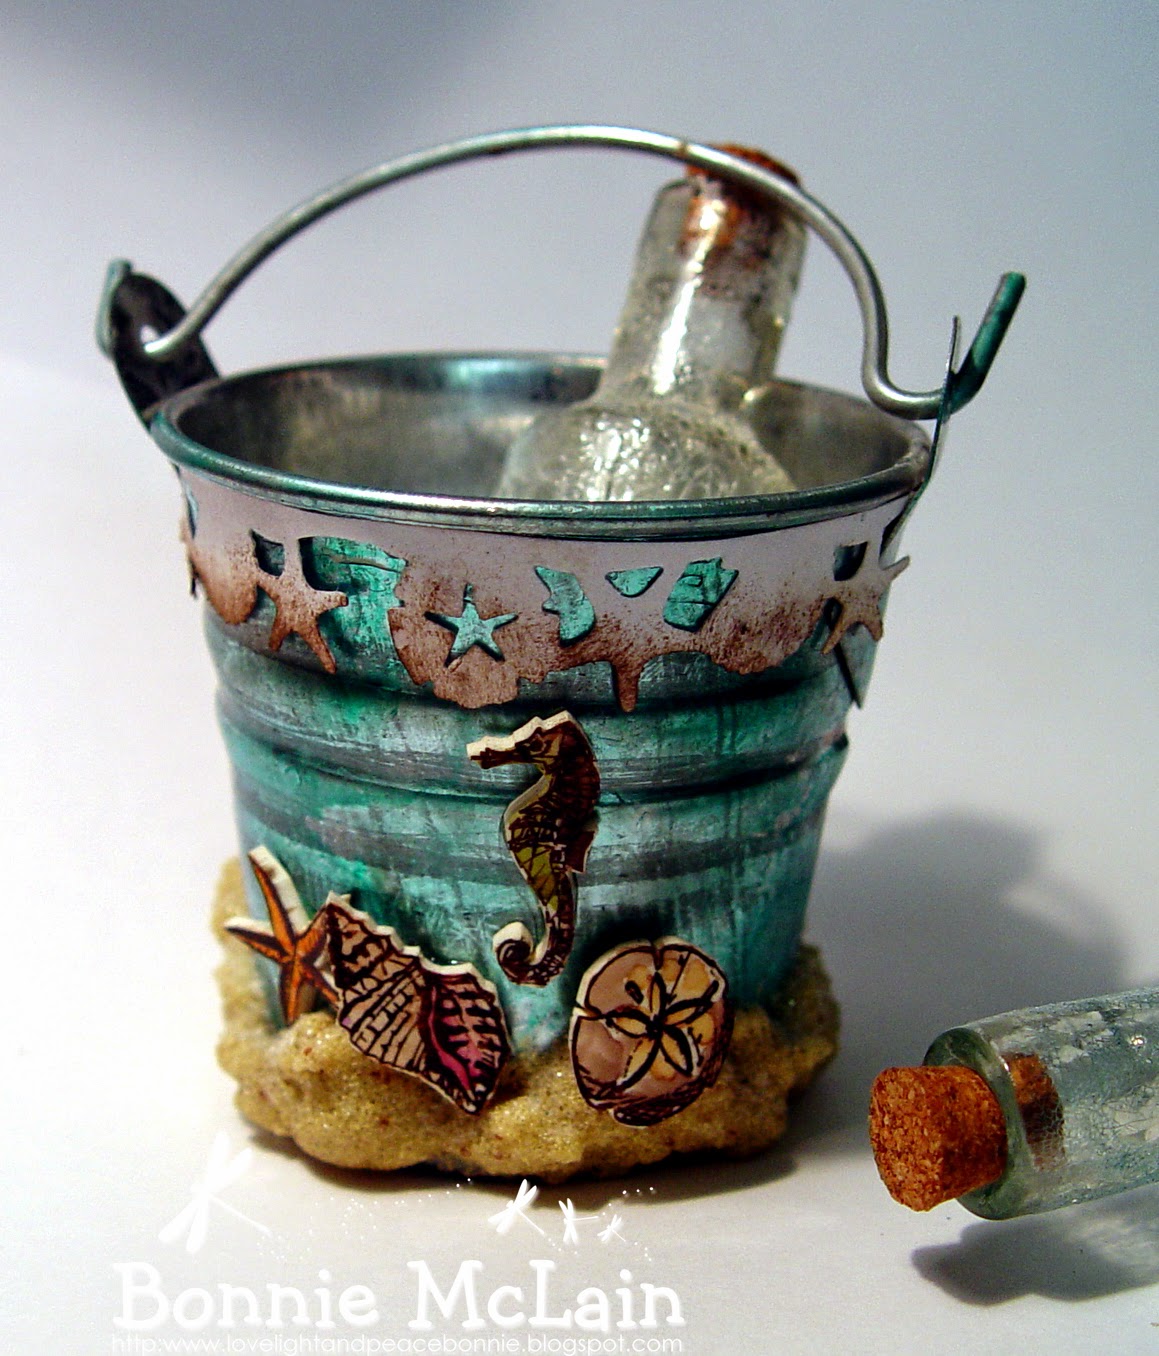
 
Here are the only two bottles I have left... and the little pieces wouldn't fit into them.. have to buy more ideology to get them...  love this little bucket... it is only about 2 inches tall... love it though... 
 
 
Okay... I still had all these other tags with sand drying on them... what was I going to do with them... I couldn't let them be undone... so I started to play... and add things and before I knew it ... I had made about 10 more beads... 


I cut my papers out of paper I created with Distress inks... and then rolled it ... and then EMBOSSED IT...  and added some JUTE to it too... left over pieces from my other tag... a few little beads... and I had my top of the tag... 


So here is the tag... with little flags on the side...  and the sand pipers looking for dinner...  and the gulls in the air... use to love to feed the gulls... and also collect star fish... 


Another tag... double... but had to use this wild piece of grunge board that I found in my grunge drawer... it had the perfect swirls all over it... and I added the little seahorse too...  and these beads are really my very favorite ones I have ever made... love them...   


Okay... here are some more beads... and also some more shrunken pieces... and the sandpiper is looking to have them for his dinner...  yikes...  love the sand ... 

 
a close up of the other pieces... 
 
 
But after making all these tags... this is not
 MY SUMMER NOW
 
I use to go to the beach and enjoy the surf... but now I live in the mountains and enjoy the mountains... all the time... I love the color of them... the scenes are always fresh and alive in my world... and I love it...  all of it...  I have found peace here in
Western North Carolina  
 and enjoy it all... so with that I present my summer here in WNC ....


My Husband and I bought this farm 12 years ago... and created an organic farm and oasis here...  it is where we live and enjoy our lives together...  so our farm is on one side of the road... and across the street is our home... which is where the back acreage is all pine trees... and it is deep...  so I had to create a pine forest on my tag... which I did... and I also used the Tall pines embossing folder for my plastic piece... love it... I think you will be able to see it in some of the other photos... 
 
I added flowers... as they are ME... I love making, growing, and picking flowers... most of our flowers though are over on the farm...  but that is okay... these are climbing on a trellis...  and I love that...  (used the tattered flower garland for mine on this tag) 
 
I also LOVE butterflies and we have quite a few butterfly gardens... all wild and natural.. with tons of milk weed for them to leave their eggs on for next year...  blue birds sing to us all day long...  so I added a blue bird...  All of these are die cuts of Tim's .. and so is everything else that was used on here... 100%... 
 
So lets see some more... 


LIVE ... I dream and live all day long... or I live in our dream all day long... no matter how you say it... living ones dream is perfect and what it is all about... 
 
Oh you asked why the orange at the bottom of the tag...
Well in Western North Carolina we have ORANGE soil..  terra cotta plus...  clay and a little regular soil... 
 
The butterflies... I tangled and colored with my distress pens... love doing water color with them... 

 
You can see my tall pines here in the plastic embossing... we have tons of tall pines...  Can you see the little fence.. .I did crackle that...Love it... sorry I had to cover it up with flowers... but they kept on growing... and I couldn't leave them off...   

 
Dreams are in purple... blues, whites, and pinks...  all favorite colors... of course the green is also on here ... so I am totally in my muse with these colors... 

 
There is not much blue sky... as the tree canopy really covers most of the sky around our house...  but I can see birds flying... can you...  and also lots of trees...  which I colored with a few mini misters that have perfect pearls and distress inks in them... love these...  always ready to use for me too... 
 
And check out that wonderful blue butterfly... 


I used my air brush tool... ??? can't think of the name of it right now... duh... anyway.. .I used it with a walnut stain marker... and it created all these little specks all over it.. .love it...  had a hard time learning how to get the pen into it correctly... watched videos and finally ... FINALLY got it... and now a great TOOL...

 
Love  the way the BLUE one turned out... so perfect... 

 
Any my little BLUE BIRD... 
  
 
So I will end with the way I began... and hope that you have enjoyed all these projects... I sure have... and now as my friends say... what are you going to do with these...  Well they go into my private stash of GOODIES... as I love them... 
 
Hope you have a private stash of things that you have made that you love...  and also that you have a perfectly wonder 4th of July to all Americans... and a great Summer day to everyone... in the entire world...  love you all.. and thanks for stopping by here for a visit...
 
Love, Light and Peace.... Bonnie 

Sunday, June 22, 2014

A little Watercolor a la Tim's CC3...


Hi... it is CC3 TIME... and that means messy studio, Messy Bonnie and having fun galore...  I had a class on Saturday, and was unable to play... but today I am ready to play hardy and have fun and create a project and a mess...  Actually I can't work in too much of a mess... but don't mind getting messy...  a fun time... 

A few things about this challenge...  all very important... and also very loving of all the people that give to this whole challenge... Linda Ledbetter, The Crew, Tim and Mario and the sponsors...  so wonderful that they all give all that they do... 

Hope you will enjoy all ... and please go to the sight and enjoy all the EYE C ANDY... lots of it there... that is for sure...


From Linda Ledbetter.... 
Welcome to the fifth challenge in our continuing exploration of Tim Holtz’s latest book, A Compendium of Curiosities, Vol. 3! If you’ve joined us before, we’re delighted that you came back for more. And, if this is your first challenge, c’mon in and join the party! The Curiosity Crew and I are so happy you’re here!
Challenge 4 was so much fun, and the participants showed us some truly incredible Layering Stencil art! We have a tough job ahead, picking our Curiosity Crew’s Choice, who’ll receive a fantastic Tim and Mario Prize Package! (If you follow me on Instagram, you beheld the wonder of all the Holtzian goodness!) We’ll be deliberating and discussing all week and will post the winner next Saturday, and we’ll also announce the recipient of the $25 Funkie Junkie Boutique gift certificate. Remember to check back and see if there’s some cool loot headed your way!
This week, we’re rockin’ the Distress Watercoloring, which you’ll find on page 39 of A Compendium of Curiosities, Vol. #3. This is a fun, simple, relax-and-enjoy-the-Zen-of-it technique, and we know you’re going to create a whole lot of greatness! Please be aware, this is technically a two-part technique (look in the book– you’ll see what I mean. There’s a Part 1 and a Part 2). It’s up to you whether you do only the portion on page 39, or go ahead and work through page 40. We’ll be giving Part 2 its own challenge later in the series.
Before you link up your own amazing creation, please be sure to review the CC3C F.A.Q. for the rules of this challenge. There aren’t many, but the ones we do have are important! If you have questions that aren’t addressed, please leave a comment here and I’ll reply as soon as I’m able to.
Everyone is welcome to participate, but you must work from your personal copy of A Compendium of Curiosities, Vol. 3. We will not be posting technique instructions on our blogs, and our participants must not, either. We require this out of respect and appreciation for all the work that Tim Holtz invested in creating this book. If you don’t have a copy, you can order one directly from Tim, and he’ll autograph it for you!
As with every challenge, the team and I will be selecting a “Curiosity Crew’s Choice” winner who will receive a fantastic collection of Tim’s products, courtesy of Tim himself and Mario Rossi, his business manager (a.k.a. Mr. “Behind the Scenes”)! To be eligible to win this prize package, you must visit each of our team members’ blogs and leave a comment there. Your comment on this post counts as your comment on my blog.

All our odd-numbered challenges are sponsored by the wonderful online shop, INSPIRATION EMPORIUM! Joy and the IE gang will award an incredibly generous FIFTY DOLLAR gift certificate to one lucky, randomly selected participant. All you need to do to be eligible is link your project here, and mention Inspiration Emporium in your blog post. You can also get 10% off any order with the code STUDIOL3!!!


I have been having fun... and this time really taking my time... I generally make a few... choose one that I like the best and that is that... but this time... a little different... I am using more things in my studio as they are out from my last class... and have been really playing a lot on the side... also had a friend over to play... so that was fun too... 


Watercolor.... on page 39... didn't ever really try this one prior to today... and really didn't think it would be that much different... as I have taken watercolor 101 and 102 and 103 in college!!!  But this was entirely different and I love it more than anything... I love the results... and they are so easy and simple... you will too... did you get your book yet... better order... you will love this one.. 


This is my finished piece...  but I did take a few pictures in getting to this point... as I thought you would enjoy seeing it all... 

 
Well when I started to play... my work table where I ink was a mess... really a horrible mess...  so I started to clean it up... and since it was Dylusions... (white) and some perfect pearl mists... not a big deal... just add some water... and then add some paper and you have the start of another project... LOL...  well there were some kraft tags... and then got dipped into the mess...  and I loved the way they came out...  so I decided to use on... and here are the end results after I stamped and watercolored it... (directions on page 39)   I love it...  I love this stamp set anyway... one of my favorites of Tim's... so very elegant... okay... now what...

 
I had a broken frame from the dollar store... it was gold in color... and 100% plastic... and split in two... well a little glossy accent healed that right away... but I didn't like the gold... and the white acrylic didn't really hide it as much as I desired... 
 
Oh this is a LONG posting... as I have two projects... LOL... so grab a cuppa of what ever and enjoy... or hopefully you will enjoy... 
 
So back to the frame... I added some white tissue paper and more white acrylic...  that did the job I needed... some of the gold still shows thru... but that is okay... not a problem.. 

 
I used my mini Walnut stain distress ink and put it in places that I desired...  also used my round blending tool.... making it a little softer in other places...

 
wrapped some hemp around the frame... and added some corrugated cardboard... ( from a spinner box!  nice corrugated...)  and then put the tag in the frame... perfect fit...
 
Then I started to add all my stuff.... stuff that I love...  made with all my Tim Toys...  like the tattered floral die cut... I love that die cut...  my very favorite...  and I made these flowers...  and I water colored the centers too...  (directions on page 39) 


You can see the bow...  with some blues, purples etc in it...  
 
I wanted to use this little bird cage... and of course the bird... so I watercolored the bird... but it is printed on a piece of sheet music... which sort of got lost.. but that is okay... it still makes it a song bird.... LOL...  anyway...  used liquid pearls for the eye...  I just love that watercolored background...  wow... my favorite technique...  love it... did I say that already..??? 

 
Here is some more of it a little closer up...  love it.. 

 
I also love making this new type of flower...  so very easy and what a lovely flower it is too...  I enjoy making these... and already have a collection of them...  what else is new.??? 

 
I water colored another scroll... and cut it out... ugh... that was very tedious... to say the least... but added that at the top right of the frame...  love it for a little dimension... 
 
You will see more of it a little bit ahead... 

 
I wanted to have a special top and bottom for this cage... so I used a special adornment from Tim's ideology selection... and then added some silver feathers...  both of which I used white alcohol ink on to take the silver away... the top adornment I did use my distress markers on to color it...  love the way it turned out... 

 
You can see the sheet music if you look real close...  click on the pic... maybe??? 


You will see all the butterflies down a little further... but I had to add this on to this frame.... I love the way my butterflies came out...  magically different and wow... love them all.. a hard decision to make...  
 
The colors were not planned... just happened... and I love the combo... 

 
The side scrolled piece... just love the whole picture...  it is in my office... and I  love it...  will remember this technique for future usage that is for sure... 
 
Okay... so as I was waiting for this one to dry etc... I got carried away with things... and started another one...  piece that is... 
 
Here it is... White on White...
 
I wanted to SHOWCASE the butterflies... oh my goodness... woke up at 2:00 AM thinking about this... LOL... good thing  that I was able to go back to sleep...  but was so excited to try it out today... 

 
Finished piece...
White on white with a monarch...  My favorite butterfly that I made today...  ... 

 
I started off with a piece of mat board... and put some things on it... gluing them down.. if you look close enough you will see some maple pods/seeds... and also some swirls, labels... and other things...  just to give dimension to this all white piece... 


You can see the maple seeds here a little bit better... on the left hand side...  and a little bit better after I used a round blending tool and walnut stain distress inks...
 
As I was having to allow this to dry in between coats of Gesso... I started to stamp butterflies...  and color them... I must have over 50 butterfly stamps... not kidding...  wow... almost as many dragonfly stamps...  you would think I loved these things or something.????  !!!!  LOL.. love them all actually... so it was hard to pick out which ones I wanted to use...  BUT... I did.. 

 
I stamped and colored two of each one...  using the water color instructions on page 39...  I had already decided that I would cut them out and put one on top of the other to make them look like they are flying...  sort of silly... but if I can make my butterflies fly... or look like they are... I will... 

 
My Favorite one...  it looks so real... and it is all done with directions on page 39... LOL...  did you order the book yet??  better...  they go fast... 

 
This is the one on the first project...  love it too.. 

 
I love this one too... actually I think I love them all.. 

 
Oh wow... love this one too..  hard choice... 

 
now to cut them all out... and see which one I will use... 

 
Using a sticky dot... I made  them into a flying butterfly... oh how I love these... they are so very vibrant, (took a lot of coats.. but I  really love the way they look)  GREAT BUTTERFLIES... and painted just the way I love them to look... 

 
I will have to make something else to use this one on... it is so yummy... love it... 

 
My Monarch won out..  and the yellow one is sitting on the side lines... I hope she knows that I will use her soon... don't feel badly... 

 
How glorious this one is... did you notice that I also cut out the antennae...  and I want you to know that they are very delicate too...  paper cut that thin is...  yikes... and I didn't loose one!!! WOW... that even is special... Did I tell you that I LVOE THIS TECHNIQUE and these butterflies.. ???? 


how special is that... 


this butterfly looks like it is printed from a magazine or something... not that is water colored..  
 
I added two of my newest style flowers... all white of course... and also some leaves from the tattered pine cone die... 

 
I love these flowers... really are fun to make... but if you have read all of this blog and don't do this water color thingy... you are missing out BIG TIME... I love this challenge and thanks to Linda Ledbetter and the CREW for all that they create and all the wonderful prizes from Tim, Mario and also Inspiration Emporium.
 
Hope you have enjoyed this blog... I know that I have really had a wonderful time creating and LEARNING how to watercolor... the Tim Holtz way... thanks Tim... I love this one... 
 
Have a wonderful creative day... and enjoy it all.. Thanks for stopping by for a visit... and see you soon.. I have to use that Yellow butterfly... and the others too... LOL..
 
Love, Light and Peace.... Bonnie