Followers

Showing posts with label Block Print;. Show all posts

Monday, June 4, 2012

Among the Violets

 It's all about TEXTURE today over at Simon Says Stamp and Show...

 SOOOOOoooooo with that in mind I create a small collage of items that  I LOVE...  I love this background paper from Tim Holtz... since I use to work in NYC and only a few blocks from Times Square it really screams at me.... so I have been hoarding this piece of paper and decided to use it today...  
 Then I had this adorable little picture of two little faeries that has been sitting on my work table ... and put that onto it too...  


A block print from one that I made a couple of years ago found it's way to the top of the work table... and so did this flourish...  do you have a bin where you keep things that you have cut out and not used... well at time these things find their way to the top of the heap and then onto the work table...  like they have legs!!!!   it was white, so I colored it... and added it as a green bough....  and added some violets...
 Of course the Violets are a natural home for all faeries so I had to add them...  and added some leaves, which is where the faeries can make a wonderful home underneath them...   the violets are also from Pretties by Bonnie collection that will be released soon... 


This is very textured...  with all the layers... but then I added a bow and also added liquid pearls in the centers of the flowers... I colored my flowers with my Distress markers... do you have them yet??? I really don't know how I lived without them... 
I use them more than any other marker set I have...  as I know the colors, love the colors and find them most useful for all my creations...  

I think I might use this as a cover for a journal...as a gift... but not really sure what I will use it for... I love it anyway... and it will find a good home...  

Thanks for the inspiration... Simon Says Stamp and Show 

Hope you have a nice day... we are doing rain dances all day long... we are loosing our crops...  not a fun thing at all... very sad...  so please ask the rain makers to come and rain on western NC.... Thanks...  Thanks for stopping by for a visit... and for all the great comments that you leave me...  I love you all...  

Love, Light and Peace.. Bonnie  

Thursday, November 24, 2011

A bird sitting on a poinsettia


Sometimes a tag, card or scrapbook page will go together really easy… and other times it takes a long long time… and it just never seems to be right… well this was on my work table for over 4 days… and finally when I added the bird… and put the bow on the birds neck… I fell in love with it… just one  (actually two little things )  made this all come together for me… I hope you like it too… 


I have two backgrounds…  as you can see…  some leaves… a spellbinder poinsettia… which that is truly a very very nice poinsettia…  I have made many… and love this … really nice…

A flower from Tim’s Tattered Floral die… my all time favorite flower maker…  using baby wipes… soft and yummy… love it all… yes I do… so much fun… 


I have to tell you this… the bird is cut out from a piece of scrap paper… it was going to be painted… but I love it just the way it is… it has the edges of being sprayed… you know what I mean… not really colored… not really clean… and it is just perfect of the belly of this adorable little bird… it is Tim’s from Caged bird die set… love it too… do you think I love too many things… LOL… I really do love a lot of things… including life and all around me… I am always trying to make it better… and it does get better each and every day… which I also LOVE….

Oh well… I better get off here now… Thanks for stopping by for a visit… and hope to see you tomorrow…  Happy Thanksgiving  to you and all of your family…

Love, Light and Peace....Bonnie 

Sunday, November 20, 2011

A fun time

 Oh what fun we all had at Scrapbook Creations yesterday...  It was a fun day!!!  


Sande and I started out early and went to Hobby Lobby first... yikes... everything Christmas was 50% off... that was bad... we went in for stickers for a book Sande is working on... and came out with no stickers... but a lot of other loverlies...  then onto Scrapbook Creations where we met all our friends...  Marie, Cheryl came up from Charlotte, and Beverly and her friend Jean...  Then we had April, Kim and Susan... too...  What a fun day... we met some wild WOMEN from Raleigh... hope that they keep in touch with us... they seem as addicted as we are all... LOL... oh we love someone like that...  Anyway girls... hope you are reading this... and that you really do keep in touch...  


We had all gotten our 6x6 Stamps and so we worked on backgrounds most of the day... in between going to the coffee shop for Lunch... and then a 3 break for Ice cream... Beverly created a sundae with vanilla ice cream, wet walnuts?  hot fudge, whipped cream, and a cherry on the top...  Oh my goodness Beverly.... how come so many gals had to get it too... ??? Was is super special..???  


Okay... it was a great day... Sande and I got home at 8:30 last night...  shy 30 minutes of a 12 hour day of playing and chatting...  loved every minute of it...  


This is a tag that I had done the day prior to our play day... but I wanted to share it with you... it is one that i used the 6x6 stamps on the background...  


The close up shows you a little more of the details...  LOL.. which we all love to see...  
I started off with a white piece of cardstock... just any kind will do...  and I used a white Dabber on a swirl 6x6 stamp... and then stamped the paper tag...  then I used my heat gun to DRY... 100% DRY.. make sure of that little tid bit...  if it is at all wet... it will not work... then using a blending tool and some ink... ( I had to use my Winter Distress inks... the two blueish ones..)  and a foam pad... I swirled the ink on lightly...  and that is the back ground... I love this ... then you take a DAMP cloth and wipe the tag .... the white will POP... great fun... 

Then I added some other things... LOL... like I wouldn't add something else...  I made a nice display of my leaves... I used my block print leaf that I have used more than any stamp this past few months.. .I really love it... 

Then I made a couple of white poinsettias... and used a Liquid pearl in the center...  I also used another Spellbinder die... for the fragile paper doily work behind the poinsettias... and colored it with a gold pen... to make it look more fragile...  

Some white Seam binding... a memo pin and token from Tim Holtz's Ideology line.... and it was done.. It will go on a special package this Christmas... that is for sure... 

Well... off for another exciting day today with my sweet hubby... we will be going up the mountain to Asheville to buy food for the holiday... and for our kids that will be coming in... can hardly wait to see them all... our 7.5 year old grandson will be coming up too... he loves to play in the studio.. and I love playing and creating special things with him... so much fun... wish they lived closer...  so I could have more time with him...  

have a great day... enjoy what ever it is you are going to do... Thanks so very much for stopping by for a visit... and if you sign up as a follower, you will automatically be notified when I post...  see you soon... Love, Light and Peace... Bonnie  

P.S.  Starting on December 1... I will have a new tag up each and every day... each tag is for the holidays...  so get ready.... there will also be more things at times... but this will also give me a little break for a while as I have some huge projects to finish... thanks again... 

Debossed Trees


Oh wow.. this is a fun technique… it is called Debossing  by Tammy who started this one… so take a look at her blog and also on Ranger blog to see all the details... you will love it... 


What you do is fill in the negative side of the Embossing and fill it with crackle… what fun!!!  Try it… you will really enjoy doing it… 
This is my first one… and now that I have the hang of it… you will see a lot more of this one…  DeBossing…  by Tammy 

Okay… I didn’t stop there… I had to add some words from my Obsession with Impression Obsession… LOL.. and that is on the left side of the tag… and then I added a flower… made from Glassine (Tim’s paper… ) and added some Barn RED  Distress Stickles on the edges… YIKES… more fun… and then some leaves and seam binding ribbon…

Love it… so much fun… do we ever have enough time to get everything done that we need to do??? Do we have enough time???? I know that I don’t… the days seem to be getting shorter and shorter… and the weeks fly by too… 


I really have to finish up my Grandsons present… which has turned into a MONSTER of a project… but I totally enjoy working on it… and I keep on thinking about how much fun he will all year with it…  yikes…  So I have at least another week of working on that… and all my kids are coming up this week… so forget all that…  automatic blogging… so that you can still have some pretties to look at while I am cooking and (cleaning… which I don’t do … against my ways of life… LOL.. wish I could really get away with that 100%)   anyway… you get the picture….

I do have a lot of things to share… and hope to get them all done prior to the big turkey day… or in our house… tofurky…. LOL… actually we are having a lot of things…  tempeh, turkey, and salmon… as we all sort of eat different diets now…  oh well… just more to nibble on… right???  It is all organic and all GREAT for the soul and body…

Hope you have a wonderful day planned…
Thanks for taking time out of your day and coming to visit me… 

Love, Light and Peace…Bonnie

Saturday, November 19, 2011

Pretty Woman


This happens to be one of my very favorite stamps… I love this stamp… it really doesn’t always come out as clear as I would like it too.. but I still love it…


I did her in Archival Black… but the background is done in Archival Coffee… and also the second layer of the background in the Archival Black also… so it sort of makes the stamp look like it was masked or something… but the stamp is cut and pasted onto the background… I colored the stamp lightly with some markers… and then added the textured accents with Liquid Pearls… her necklace, flowers and ring… and then added my flowers… plain and simple… love it… as this is a favorite stamp….

I really have enjoyed this challenge GREATLY this week… Thank you Simon Say Stamp and Show… I think I have had a lot of entries… but when it is pleasurable … always enjoy to the fullest… and I have… thanks again…

Thanks for stopping by for a visit… I am down in South Carolina playing with a group of my friends today… so this post will go up automatically… so have a fun day… enjoy and post your fun…
Love, Light and Peace....Bonnie 

Friday, November 18, 2011

One Dove


I have really been having fun with the theme this week onSimon Says Stamp and Show challenge… it is WOMEN!!!!   A long time ago I took all the wood off my stamps to make room for an expanding experience… and then organized all the stamps into drawers… so my Human drawer had not been used in a while… so it was good to take all the stamps out… look at them and try and decide which one to use…  Well as you can see by now… I stamped quite a few… and since they were sitting on my work area, I have used them… and also wanted to share them with ya’ll….  


So here is another one… I think this stamp I bought from Stampington and Company… but I am not really sure… when you remove the wood.. you have to rely on the brain…  oh well.. so much for that… 

I used a background stamp 6x6 from Impression Obsession and used a distress ink on the stamp…  love it.. it was a little hard, so I think I had better re-ink all my distress ink pads this week…  I made the flowers using a baby wipe… what else… my favorite type of soft flower… and I used my Tattered Floral die cut by Tim Holtz…  


The butterfly is from a set of butterflies I bought from Ecstacy crafts… love the set… all three of the butterflies are wonderful…  very delicate… as is this scene on the stamp…  


 The coloring on the stamped area I did with markers... I use all different kinds of markers... and also a little twinkling H20's...   The leaves were stamped with Distress stains.. and then I used embossing powder on them... so they have a nice rough texture to them... a contrast to the picture...


The lower edge of the tag is a Martha Stewart punch… twig… and then I dressed up the area with some Seam binding ribbon and some pearls…  I bought these pearls at a box store… the big one… and didn’t know what I was going to use them on.. but loved the assortment of colors…  as you can see they all fit into this color design perfectly… 

The leaves are leaves I drew and cut out in a block design… a favorite of mine this season… 

One more tag.. and this will be sent with a birthday present also… Happy Birthday to you too.. no matter when your birthday is… enjoy it… it is a special day for YOU…

Hope you have a fun day… it is raining here… we do need it… so that is a good thing for us…  Thanks for stopping by for a visit… and hope to see you again soon…
Love, Light and Peace....Bonnie 

Monday, November 7, 2011

Can you see me???

 This week's ALTERED ALICE challenge is to make something that represents FALL.... so here it is... I had so many ideas... but this is the first one that has come out onto the paper .... ( you will see more...) you know I love doing paper things... and love ALICE things too... 

Anyway... this is the little Cheshire cat... in the tree playing with all the fall leaves... trying to hide... "Can you see me"  
 
I think so... but if you think I can't that is fine too...  you will disappear anyway...and then appear when you need to... LOL... you silly cat.  

Okay... fall to be is the many wonderful colors that all the leaves turn... and I do love them all... so that is what this double tag represents...  Yes there are two tags there... one underneath has all the leaves attached.. which were cut out with the Tim Holtz tattered leaf die... from SCRAPS that were left overs from Twinkling H20 papers... I just can't throw out pieces of that paper... they are too pretty... so I cut leaves and flowers from it... they are always handy to use for all kinds of things... such as this tag...  

These leaves were all glued onto the tag that I colored with Ripe Persimmon  (new TH Distress Fall ink set)   The smaller tag was colored with Twinkling H20's... but the leaves (I made the stamp)  were colored with Distress stains...  and the CAT... he was colored with an assortment of markers...  (Tombow and Mementos)  

I cut the letters out of black cardstock freehand...  and the crowning glory... the seambinding tapes... they were colored with all the fall colors... 

Yesterday (sunday) Glenn and I took our usual Sunday drive up the mountain to do a little food shopping and seeing the leaves... and the colors are just about in their prime... so very pretty... I dont' think we are going to have a really bright year... but what we did see was wonderfully colored for our eyes... we totally enjoyed the fall foliage and colors...  so this is also a CAN YOU SEE ME... the beauty of fall all around you... are you looking... or is it hiding from you..  

Take a look and see...  

Have a fun day.. thanks for stopping by for a visit... and hope to see you soon... 

Love, Light and Peace.... Bonnie

Monday, October 10, 2011

Halloween is almost here...


Halloween is almost here…
Spooky and full of color… lots of fun for children…
Costumes, trick or treaters… lots of fun is what I think of when I think of Halloween…

So here are a few tags that are simple… for a fun time of year…  


The CROW… my favorite bird until this year… I still love them… but hey they can really do some damage to a crop… they ate all my watermelons… and all our corn… and then hopped in to destroy the beans and pulled down sunflowers… bad birds… but they are the LAW of the bird colonies… and are really majestic in many ways…
This tag was created with Distress ink pad rubbed on my worksheet and then spritzed with water… and then I dribbled water over the top in certain areas to create the ‘bleached’ affect… The leaves are stamped with a gold liquid that I bought years ago… and it leaves a raised effect… also a twinkling nice effect… I made the stamp from eraser rubber and created the design myself…   the bird’s paper was created the same… but no spots… and then cut out with a Tim Die cut…  the pin and token added for the Halloween theme.  
 
 Both of these tags are for the following two challenges... where on Grungy Monday you have to create something with Tim Holtz products and also a Halloween theme... Grungy Monday  and the wings are are to be used for the  Simon Says Stamp and Show Challenge.  


This tag was created a little bit differently.. the Distress Ink pad was rubbed on the worksheet and then spritzed with water...  allowed to dry and then embossed with the pumpkin embossing folder by Tim Holtz... Then I used his Tattered Leaf die cut to create the leaves... but I also used paper that I had created the same as the tag...  and added some golds and silvers to the leaves, just for some added color... Fall is so wonderfully colorful in all ways... natures last yahoo to color until the white snow falls...  

The Bats were added ... for the spookiness of the Halloween spirit...YEAH...  The 31... well that is the night of all wonderment...  and the numbers are made from what else... GRUNGE BOARD!!!  Painted black and then embossed with vintage photo embossing powder...   love it... The pumpkins are colored with inks from distress pads...  and a brush... really gives them a nice soft look... 

So there you have a couple of tags... I have a few more, but will spread them out in the next few days... thanks a lot of taking look today... and hope to see you tomorrow...  have a nice day... 
Love, Light and Peace...Bonnie   

Sunday, October 2, 2011

A very SPECIAL book for a Very SPECIAL person


This is a special book that started out to be something else and turned into one of my very favorite books I have ever done…

First off.. I started by making the ‘rubber stamp’ myself… it is a block cut from rubber… and I love leaves, so I started to play with different colors… since I had the newest Tim Fall set of colors.. I started off with that… and stamped a whole 8.5 x 11 sheet with leaves in the trio of wonderful colors…  then I moved on… you will see quite a few different color sets… each sheet was cut into four sections… and mounted in this little book I bought for only $1.00 … big spender I am… LOL..

I let nothing go to waste… even the smallest scraps were used… so all each page is in this book…

I did emboss some of the pages prior to cutting with Distress embossing and also metallic embossing… I used Distress ink pads, and also Distress Stains on the
‘rubber stamp’ 

Other stamps that I used were assorted, but generally they are all Tim Holtz stamps…  I used a sheet of word stickers that has to be at least 8 years old… maybe more???  And the die cuts were all Tim’s… as I am sure you can tell… I painted them, stamped them, had fun with each and every page… I tried to match up colors so that each page was alive and living… also did totally out of the box things like purple trees… and square holes in the bird…  you will see as I go along with each picture of each page… I will try to explain as much as possible… in as few words as possible… I can be wordy at times… but want you to get the whole idea from this book…

This book is for my hubby… it is his 70th Birthday today…  yikes… we don’t seem that old at all… LOL…
The numbers in the book total up to 70…  and at the end of the book I put a picture in of him, prior to the children being born… LOL.. we both gained years after that… LOL… don’t we all???

Okay… so here are the pages…  if there is nothing new,  there will be no  words and you know all… 
The Cover


 The cover… a flower that I made using Tim’s die cut… 
The bird was from a spellbinder… but I cut the center out… and put a sticker in there… floral delight… The wing is ideology from Tim…  letters GROW  also ideology grunge board…  love them… painted with black distress stains and then gloss accents on top… nice finish… 

up close of the bird, wing and flower


Milled Lavender and Concord Grape Trees


 Leaves… I love to make papers… and so often when I am up late at night and want to be quiet, I will make a lot of pretty papers… so from time to time, I will cut up some of the scraps and turn them into leaves… I always use the Tattered Leaves by Tim Holtzs line…  sometimes I will use a gold pen to outline the edges… but sometimes just as you see them here…


  I love banners.. but have to be honest and tell you that I hardly ever make them… but wanted to make one for this book… I took a piece of cording that is recycled and used staples that I dyed with my alcohol inks…


  The bottle has a safety pin in it… they use to be very valuable years ago… so since this is a vintage page… I put it in the bottle… 
Vintage page, with tons of goodies


Recycle all you can


So often we throw out some of the best things… I had a couple of flaps from a small box on my work table… and I peeled off the paper on one side… and I had this wonderful corrugated look.. I used some mini misters and again had wonderfully colored corrugated board… that would cost $$$  But mine was free … oh yeah… a few squirts from mini misters… I cut them into squares and have a really nicely textured look here…

The bubble paper… is actually metal… (tape for H&AC bought from Home Depot…  $20.00 for a huge roll… ) 
I apply the tape to cardstock and then can be as creative as I want to be…  I ran this thru an embossing folder… and then alcohol inks on the top…  lovely texture again…


Metal ideology numbers that are covered in tissue tapes…  Oh wow… love that look… so nice… 

Forgot to mention that all the ribbons I have dyed are rayon seam binding tape… and I love the wrinkled look… smooth is not my style at all.. I love freedom of all kinds…  YEAH… and I had fun making these along with all the papers… 


Pink and bluish purple leaves... out of the box


Acorns are beautiful this year. 


Tall pines with clouds


On this tag, I loved the tall pine trees… but they looked so lost… so I added some grass… and then added some sky… BUT … the sky has one added feature… Picket Fence Distress Stains… Oh how did I live without it prior to now???  I made instant clouds with it… and they faded a little so I went back in again and made them darker… LOVE IT…  do you have yours yet???  What a wonderful product this is…

Also tore a section of an old map out… and this is where we live…  so it is meaningful to us…


20…  Do you have any gold stickers… and some copper mesh screen..  I mounted the stamp onto the copper and cut it out… really wonderful look… 


23.. Resist with a white dabber……love that too… have you tried that technique… ??? You will love it… Using a stamp of your choice… put white dabber on it… and then stamp it onto your paper… allow it to dry or heat it dry… then with a blending tool and sponge,  and distress ink, color it…  allow it to again dry… and then moisten a paper towel with a little water and wipe off the are where the dabber paint is… love this resist effect…  so will you…


So there is my book… Happy Birthday to my sweet and dear hubby of 42 years…  Yikes we are getting younger… 

Have a great day… Thanks for stopping by for a visit… and hope to see you again soon… Love, Light and Peace…Bonnie 

Tuesday, April 26, 2011

A Play Day....


Oh what fun we had… making flowers and cards...  
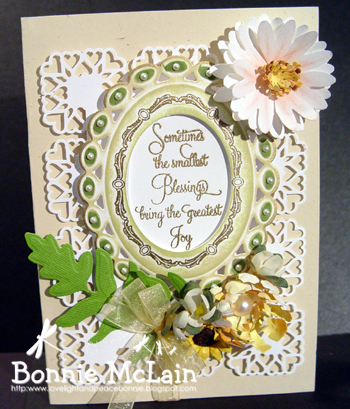
The bottom flowers on Joy card...  more below 


Sande
Sande making flower layer


and Marie
Marie making a flower layer

and I played making flowers… we had so very much fun… first off we had lunch… then we got started having fun… talking is all part of it… and we certainly did a fair share of that… 
Then we got down to serious business… making flowers!!!
First off I have to refer to a card I made for the Just Rite Challenge… as this is what started the whole flower thingy…  I wanted to make a card… but had really cut my finger very deeply… thank you to all that worried about it… my immune is very strong, so in a two days I was back to normal… but because of the cut, had come up with a new way of making flowers… I was unable to ‘twirl’ the stylist to create the paper to bruise… and turn up… so what is the next best thing???  To pound on it… which I did… and it was a little hard, so I used my water sprayer and spritzed some water onto the painted flowers… voila’ it was a wonder… and then I layered them to create SOME flowers… well if you know me at all… I am very prolific.. so I made quite a few flowers… but had to share with friends… so here are Sandy and Marie making their flowers…  (by the way… both loved the flower that they made too.. and we found a few more techniques too… )  so much fun to play and create..

Well…. Here are a few of the cards I put together after they left… 


I again have to refer back to tell you that I got some new Just Rites… and HAD to play with them… so I stamped them all… some in ink, some embossed … and then I sat and colored them in with markers, H20 paints what ever I felt in the mood to do… each one is alittle different as you will see.. .I got over 20 of these stamped and colored… then I started to mount them onto papers or onto spellbinders etc… what ever moved me with each unique piece… that is one thing that I really find so very enjoyable about using Just Rites… each time I use one, it is entirely different… no two are alike… I really have a hard time doing that…  after I had each medallion made, I then made the card for each one… 5x7, 6x6 or 5.5x8.5   three of the sizes that I use all the time… then I placed a medallion on each one… and had ‘kits’ made up for each one of the medallions… a flower in each pile… naturally to match the color scheme… and then a bow or two… and other flowers that I wanted to use… maybe even an embossed background paper… leaves and anything else that I felt had to go with the making of each card…

So that is what I did… and here are the first ones off the production line…. LOL.. some production line huh???


I really had a fun day with Marie and Sande… and also had a lot of fun even after turning all the flowers in to cards…  Hope that you will have fun with making flowers… they are a lot of creative fun… and we used generally the Rose Spellbinder set… it was just perfect… and also H20’s to color the paper…  a little glue, a gem stone or pearl in the middle and it is almost as good as real…


Have a fun time making some… And t hanks for stopping by for a visit…  See you soon… more cards will be following tomorrow… some back for another visit…
Love, Light and Peace....Bonnie